Starting your journey in computer hardware installation can be exciting and rewarding. With the right tools and knowledge, installing hardware in your computer is easy. Whether you buy a desktop from Dell or PC World, or build one yourself, knowing the basics is key.
As a beginner, having a detailed guide is vital. It will help you through the steps and hardware needed to build your PC. This includes the CPU, motherboard, RAM, and storage.
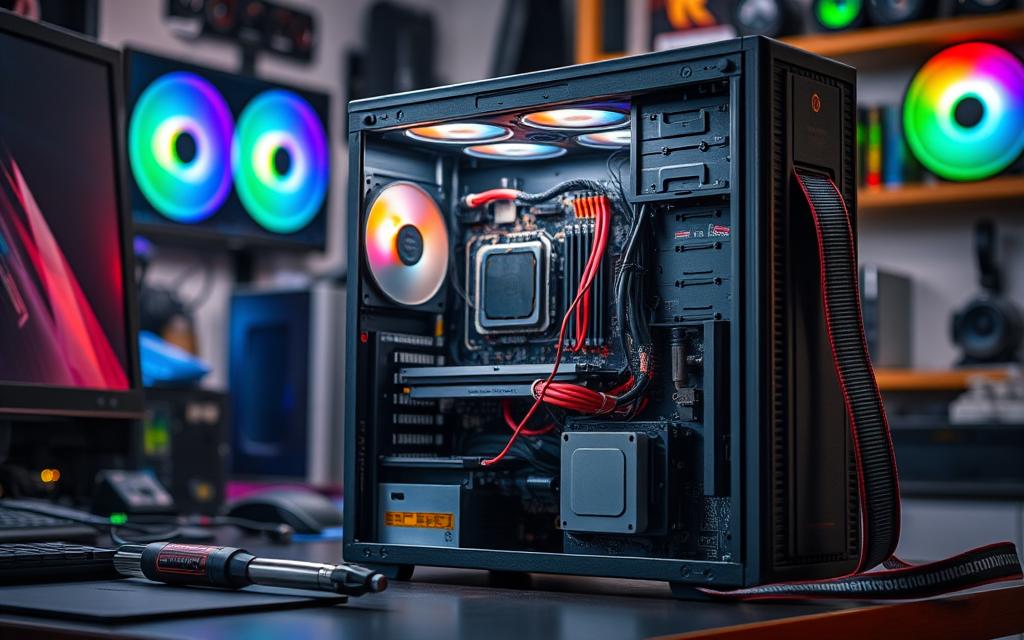
Choosing the right PC case, motherboard, and cooling system can be tough. With options like the Corsair 4000D Airflow case and the Corsair H100i Elite liquid cooling kit, it’s easy to get lost. But with the right advice, you can pick the best parts for your budget and needs. This makes building your PC a fun and cost-effective experience.
When you’re setting up hardware in your computer, knowing the computer architecture is key. This includes the CPU, motherboard, RAM, and storage. To make sure everything works well, follow compatibility guidelines and check the system needs. You can find out more about computer architecture and its parts to make smart choices.
The basic components of a computer are the CPU, motherboard, RAM, and storage. The CPU, or processor, is the computer’s brain and does the math. The motherboard connects all the parts together. RAM stores data and apps temporarily, while storage keeps the operating system, programs, and data. For more on your computer’s parts, visit this website.
To ensure things work together, check the system requirements and follow compatibility guidelines. Look at the processor speed, RAM, storage type, and graphics card. By knowing your computer’s computer architecture and following compatibility guidelines, you can pick the right hardware. This will help your computer run smoothly.
Essential Tools and Safety Precautions
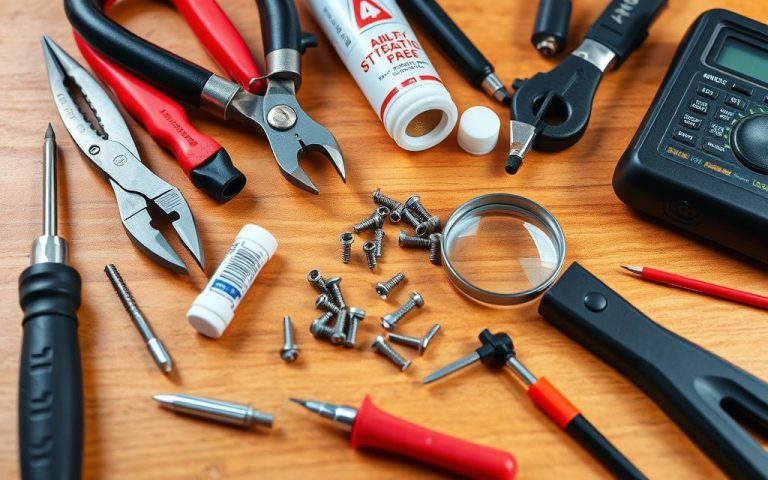
Installing hardware in your computer needs the right tools. You’ll need precision screwdrivers, needle-nose pliers, and a cable tester. It’s also key to take safety precautions to avoid damage and keep yourself safe.
Using an anti-static wrist strap is a must to prevent static damage. It discharges static from your body, protecting your components. Also, grounding yourself by touching metal or wearing an anti-static wrist strap is important.
Here are some other essential tools and safety precautions to consider:
Precision screwdrivers with various sizes and types of heads
Needle-nose pliers for reaching tight spaces and bending delicate components
A cable tester to identify faulty cables
A multimeter to diagnose power-related issues and test components
With the right tools and safety steps, you can have a successful and safe installation.
Tool
Description
Precision screwdrivers
For opening different computer components
Needle-nose pliers
For reaching tight spaces and bending delicate components
Anti-static wrist strap
For preventing damage from static electricity
Preparing Your Workspace for Hardware Installation
To ensure a successful hardware installation, it’s key to prepare your workspace well. You need to create an anti-static environment to avoid damaging sensitive parts. A bright and well-ventilated workspace helps prevent overheating and damage.
It’s also important to have your tools organised properly. You’ll need screwdrivers, anti-static wrist straps, and cable ties. Organising your tools and parts makes the job faster and less likely to have mistakes.
Using an anti-static mat or wrist strap to prevent static electricity damage
Ensuring proper lighting and ventilation to prevent overheating and damage to components
Organising your tools and components in a logical and accessible manner
By following these tips, you can make a safe and efficient workspace for your hardware installation. This will help you achieve a successful outcome.
How to Install Hardware in Computer: Step-by-Step Process
Installing hardware in your computer is easy if you follow a step-by-step guide. Make sure all parts fit well and you have the right tools. Always turn off and unplug your computer first to stay safe.
Keep your workspace clean and tidy to avoid damaging parts. Use an anti-static strap and ground yourself to prevent static damage. The step-by-step process includes installing the CPU, motherboard, RAM, and storage. Then, connect all cables.
Here are some important tips for a successful hardware installation:
Check if components are compatible before you start
Make sure you have all the tools and materials you need
Use anti-static precautions to protect your components
Follow the instructions for each part carefully
By following these steps and being careful, you can install your hardware successfully. Then, you can enjoy your new computer.
Power Supply Installation and Management
Choosing the right power supply is key. Look at the wattage, voltage, and connectors. A good rule is to pick a PSU that’s 150-200W more than your system’s total power needs. This extra power helps with sudden spikes.
Cable management is also vital. It boosts airflow and makes your PC look neat. Modular power supplies let you pick which cables to use, cutting down on clutter. Semi-modular PSUs offer a mix, while standard ones have all cables built-in.
Check the power supply’s efficiency rating, from 80 Plus Bronze to Titanium. Higher ratings save on electricity and reduce heat. When installing, unhook all wires from the motherboard first. Then, secure the PSU with screws. Route cables through the back and connect components as the motherboard suggests.
By keeping these tips in mind, you can install a power supply safely and efficiently. Always look for an 80 Plus rating. This ensures the PSU meets quality and efficiency standards, from Bronze to Platinum.
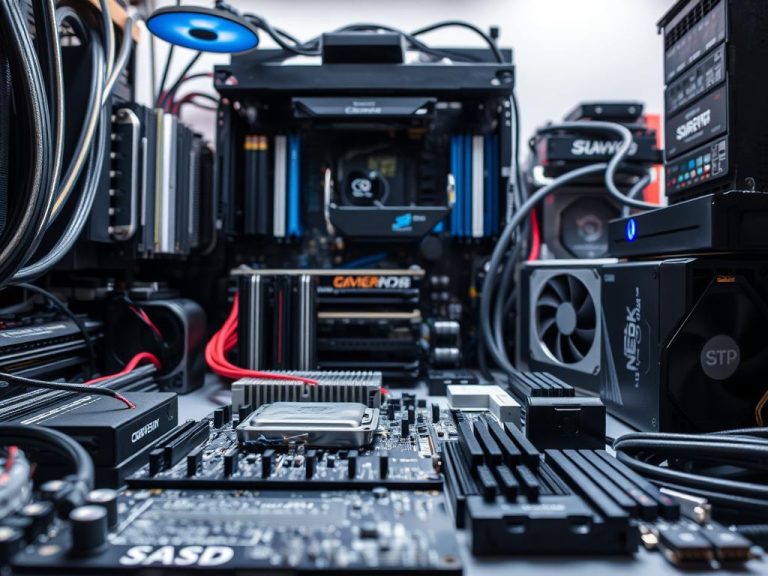
Installing Storage Devices and Memory
Choosing the right storage devices and memory is key. Storage devices like hard drives or solid-state drives hold your operating system, programs, and data. RAM temporarily stores data and apps, making them faster to access and process.
When installing storage devices, think about storage capacity, interface type (e.g., SATA), and motherboard compatibility. Popular internal hard drives include Seagate BarraCuda, Toshiba X300, and WD Black. For memory installation, make sure the RAM fits your motherboard and meets system needs.
Here are some key considerations for installing storage devices and memory:
Choose a storage device that meets your needs, considering factors such as storage capacity and interface type.
Ensure that the RAM is compatible with your motherboard and meets the system requirements.
Install the storage device and RAM according to the manufacturer’s instructions.
Consider the benefits of using SATA 3 (6-gigabit) compliant cables for secure connections.
By following these guidelines and choosing the right storage devices and memory, you can ensure your computer runs smoothly. Always check your motherboard manual for recommended slot configuration. This helps enable dual-channel mode and boosts your computer’s performance.
Graphics Card Installation and Setup
Installing a new graphics card boosts your computer’s performance and graphics quality. First, pick a graphics card that fits your system and motherboard. For more on graphics cardinstallation, visit this link.
Choose your graphics card and install it in the PCIe slot on your motherboard. Ensure it’s securely connected and power cables are attached. A graphics card draws a lot of power, so check your PSU can handle it.
After installing, install the driver installation for the best performance. Download the latest drivers from the manufacturer’s site, like AMD or Nvidia. Also, check the graphics card‘s size to fit in your computer case.
Check the compatibility of the graphics card with your motherboard and power supply unit (PSU).
Ensure the PCIe slot on your motherboard is available and compatible with the graphics card.
Install the necessary driver installation to ensure optimal performance.
Component
Requirement
Power Supply Unit (PSU)
500 watts or more
PCIe Slot
Available and compatible with the graphics card
Driver Installation
Latest drivers from the manufacturer’s website
Motherboard Component Installation
Installing motherboard components needs a step-by-step approach. This ensures everything is connected right. The installation starts with the CPU, which must be firmly attached to the motherboard. This is vital as the CPU greatly impacts your computer’s performance.
First, set up your workspace and collect all tools and parts. This includes the motherboard, CPU, RAM, and storage. Grounding yourself is also key to avoid static damage. After these steps, you can start installing, beginning with the CPU and then the other motherboard components.
Important things to remember when installing a motherboard include:
Make sure the motherboard fits well in the case and is securely fastened.
Connect the front panel headers, like the power and reset buttons, and LED lights.
Install the CPU and cooler carefully to avoid damaging pins or pads.
Add the RAM and storage, following the manufacturer’s guidelines.
By following these steps and connecting each part carefully, you can ensure a successful motherboard component installation. This will get your computer running smoothly. Always refer to your motherboard manual and online guides if you face any problems during installation.
Cooling System Setup and Optimisation
Setting up and optimising your computer’s cooling system is key. It prevents overheating and damage to your PC. You can choose between air cooling and liquid cooling, based on your needs and budget.
Air cooling is cheaper and easy to set up. Liquid cooling, on the other hand, is more efficient and quieter.
Thermal paste is important for the CPU and other parts. It helps in even heat transfer and prevents hotspots. Applying the right amount of paste is critical for good cooling.
Regular maintenance is also important. Cleaning dust from vents and fans helps with airflow. This prevents overheating.
Benefits of Optimised Cooling
An optimised cooling system has many benefits. It leads to faster and more consistent performance. It also means longer life for your components and quieter operation.
Keeping your computer’s parts at a safe temperature is key. This prevents damage and ensures reliable use. Important steps for optimising cooling include:
Cleaning the computer regularly to remove dust and debris
Checking component temperatures with software tools
Adjusting fan settings for optimal airflow
Upgrading cooling components, such as fans or heatsinks, as needed
By following these steps and choosing the right cooling system, your computer will run smoothly. Whether you choose air cooling or liquid cooling, a well-designed system is vital for reliable performance.
Cooling System Type
Benefits
Drawbacks
Air Cooling
Cost-effective, easy to install
Noisier, less efficient than liquid cooling
Liquid Cooling
More efficient, quieter than air cooling
More expensive, complex installation
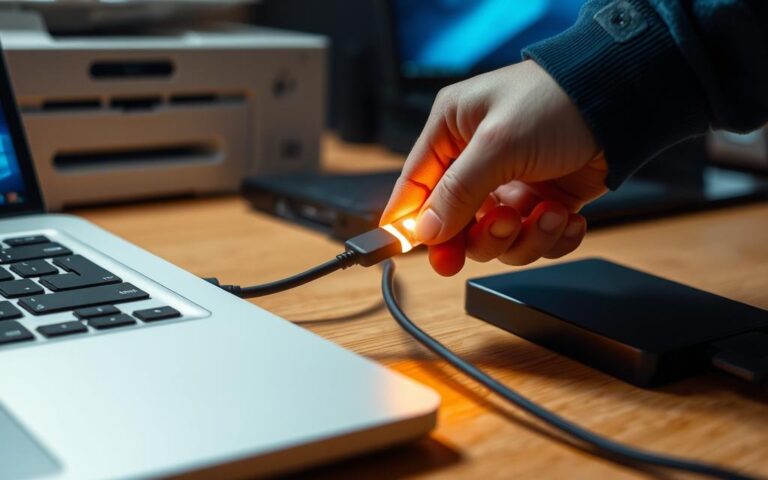
Testing Your Newly Installed Hardware
After installing new hardware, it’s key to test it. This ensures it works right. You need to do hardware testing and troubleshooting to find any problems. A good PC building experience starts with a clear testing plan.
Many hardware failures happen soon after installation. That’s why testing after you’ve installed or upgraded is so important. Tools like Windows Memory Diagnostic and Intel Processor Diagnostic Tool help find issues.
Here are some tests to do:
Check if the hardware is recognised in the BIOS or UEFI settings and during boot.
Use tools like Prime95, FurMark, or MemTest86 for stress tests.
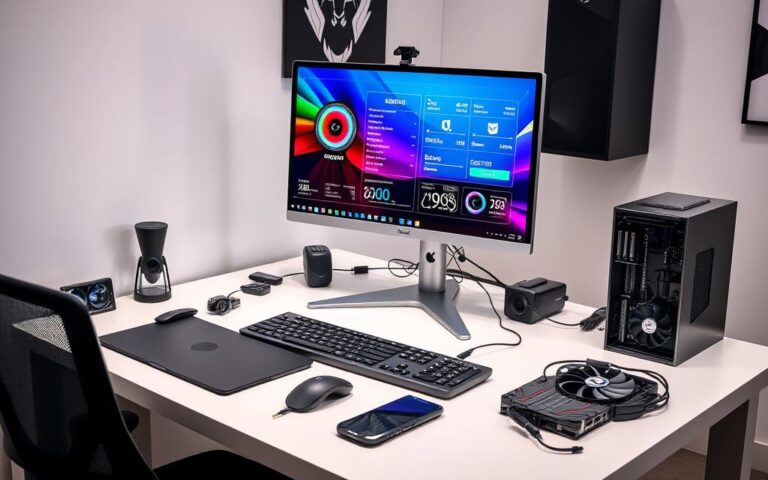
Watch how your system performs with Task Manager or HWinfo.
Keeping your system in top shape is also key. Make sure to update regularly and clean your disk. These steps help ensure your new hardware works well and your PC runs smoothly.
Remember, troubleshooting is a continuous task. Be ready to find and fix problems as they come up. If you’re not sure about anything, don’t be afraid to ask for help.
Test
Tool
Purpose
Stress Test
Prime95
To test CPU stability
Memory Test
MemTest86
To test RAM for errors
Graphics Test
FurMark
To test GPU performance
Conclusion: Embracing Your New Technical Skills
Congratulations on finishing this guide to installing hardware in your computer! You now have key technical skills to upgrade and customise your PC with confidence. As technology keeps changing fast, knowing how to handle computer parts will become more important.
By 2025, over 50% of workers might need to learn new skills because of new tech. More than 60% of the skills needed for jobs will change too. By using your new technical skills, you’re making yourself ready for the changing job market.
You can now do many PC tasks, like upgrading storage and memory, or fixing cooling systems. These skills will make your computer use better and might lead to DIY projects, part-time jobs, or a career in tech.
Keep learning and improving your technical skills. Stay curious and learn about new parts and tech. The skills you’ve learned today will help you a lot in the future of computing.
FAQ
What are the basic computer components that I need to understand?
The key parts include the CPU, motherboard, RAM, and storage like hard drives or solid-state drives.
How do I ensure the compatibility of my computer components?
Make sure all parts fit together well and meet the system’s needs. Check the specs of the motherboard, CPU, RAM, and storage.
What safety precautions should I take when installing hardware?
Use an anti-static wrist strap, ground yourself, and work in a safe area to avoid static damage.
How do I organise my workspace for hardware installation?
Create a safe area, sort your tools and parts, and ensure good lighting and air flow.
What is the step-by-step process for installing hardware in my computer?
Start by installing the CPU, motherboard, RAM, and storage. Then, add the graphics card and connect all cables.
How do I choose and install the right power supply for my computer?
Pick a power supply based on wattage, voltage, and connectors. Use cable management to keep things tidy and cool.
What are the key considerations for installing storage devices and memory?
Choose devices and RAM that fit your needs and are compatible with your motherboard and system.
How do I properly install a graphics card in my computer?
Choose a graphics card that fits your system. Install it in the PCIe slot and set up the drivers.
What are the steps for installing the motherboard and its components?
Install the CPU, RAM, storage, and graphics card. Connect all cables as needed.
How do I set up and optimise the cooling system for my computer?
Decide between air or liquid cooling. Apply thermal paste and follow the manufacturer’s setup instructions.
How do I test the newly installed hardware to ensure it’s functioning properly?
Test the CPU, RAM, storage, graphics card, and cooling system. Make sure they work with your operating system.
Computer hardware forms the physical backbone of modern computing systems. These tangible elements process, store, and manage digital information1. They enable computational tasks and user interactions2. Hardware includes internal and external devices that create a functional computer system1. These components fall into four main categories: input, output, processing, and storage devices2. Internal hardware like the…
Knowing how to view the hardware components of your computer is key to improving its performance. This knowledge is essential, whether fixing problems or looking for new parts to add. In today’s world, even one outdated part can slow down your computer or cause crashes, especially with tasks like video editing. Advanced users benefit from…
In today’s fast-changing tech world, people often ask if computer science includes hardware topics. This question is key for anyone wanting to grasp how hardware and software work together in modern gadgets. Computer science looks at the theory, design, making, and performance of software and systems. It also covers important hardware topics. Understanding both is…
It’s annoying when your computer doesn’t recognize a hardware device, especially with a Code 45 error in Device Manager. This problem often means the system can’t find the hardware due to physical or software issues. In this article, we will show you how to reconnect your hardware device. We’ll cover different ways to troubleshoot this…
Understanding your computer’s hardware specs is vital for better performance. Most performance problems are due to low specs. By knowing your PC hardware, you can decide on upgrades. This guide will show you how to check these important specs to improve your system. Understanding PC Hardware Specifications It’s important for users to understand PC hardware…
Computer hardware tools are key for keeping, fixing, and improving computer systems. Knowing these tools is vital for anyone who uses a computer. When setting up or upgrading a computer, it’s important to think about the hardware needs. The right tools can ensure everything works well together. A modern computer needs a PSU between 500…